Run ARM/MIPS Debian on QEMU
Introduction
As is often the case, IoT security engineers would like to emulate and debug a binary or rootfs of an uncommon architecture, like ARM or MIPS. This post would like to introduce a good way to ease the pain of such debugging: running ARM/MIPS Debian on qemu-system. Besides, I succeed in cutting down the installation time, compared to some other similar posts.
I would like to take ARM Debian as an example, which basically is the same with MIPS Debian.
This post also has a Chinese version: 在 QEMU 上跑 arm/mips 架构的 Debian.
Background
The most common way to install ARM Debian on qemu-system is by running netboot installer because its initrd and kernel can be easily obtained. In general, it’s feasible indeed, but due to the performance lost in qemu emulation, especially network adapters emulation, it’s almost impossible to finish the installation in a few hours. Thus, a better way should be running the offline installer but still I haven’t found any similar posts as the time of writing the post (PS: the Chinese one). After some exploration, I get the offline installer work and shorten the installation time from several hours to about half an hour.
Preparation
Environment
I always prefer KUbuntu, so just install qemu by apt.
1 | apt install qemu-system qemu-utils bridge-utils libguestfs-tools |
Besides, download the armhf Debian DVD.
1 | wget -c "https://cdimage.debian.org/mirror/cdimage/archive/10.7.0/armhf/iso-dvd/debian-10.7.0-armhf-DVD-1.iso" |
Disk Image
Create an empty disk image by qemu-img
1 | qemu-img create -f qcow2 debian.qcow2 8G |
Installation
Extract initrd and kernel
qemu-system requires initrd and kernel to emulate Linux. In fact, it’s grub’s work in a real boot process. Therefore, let’s check how it works.
1 | mkdir mnt |
And we can see the boot entry.
1 | menuentry 'Install' { |
Extract initrd and kernel.
1 | cp mnt/install.ahf/vmlinuz ./ |
Mount DVD
You may already know that the Debian installer installs the whole system by just setting up /cdrom as the apt source and doing a big apt install. Thus, to install our ARM Debian, just mounting the DVD and starting the installer with initrd and kernel shall work as expected. However, I found that the -cdrom of the qemu-system didn’t work at all! I did lots of research but still didn’t know the exact reason. I guessed it was probably due to the driver problem. Therefore, I had to mount the DVD to /cdrom manually which would be shown in later chapters.
Network Driver
Another problem is that qemu-system doesn’t support PCI network card. According to some discussion, maybe the ARM Debian itself doesn’t have the corresponding support. In a word, to create a network adapter for ARM Debian, “virtio-blk-device” seems to be the only choice which can be specified by -netdev and -device. Note that -nic doesn’t work.
Besides, for tap mode network cards, a bridge should be created.
1 | brctl addbr br0 |
Install the System
Finally, the full command line to run the offline installer. If tap network device is specified, the sudo is necessary.
1 | sudo qemu-system-arm -machine virt -cpu cortex-a15 -smp cpus=4,maxcpus=4 -nographic \ |
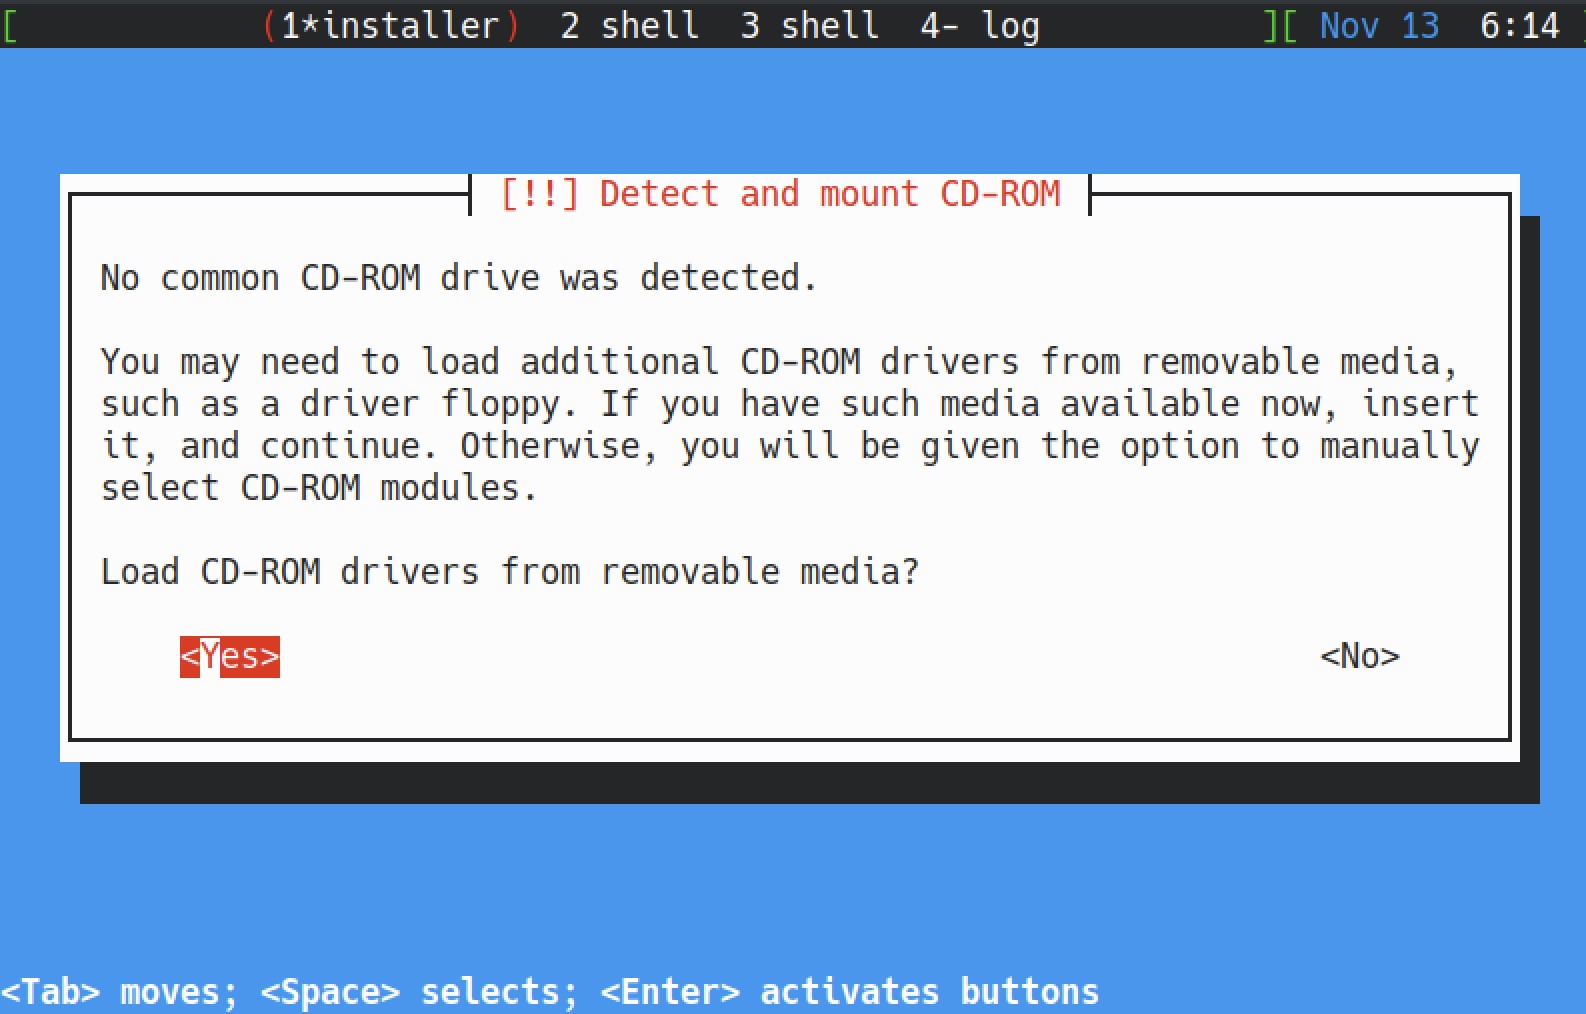
Note that here debian-10.6.0-armhf-DVD-1.iso is mounted as an HDD, so the first error we get is cdrom missing.

Select No and navigate to the main menu.

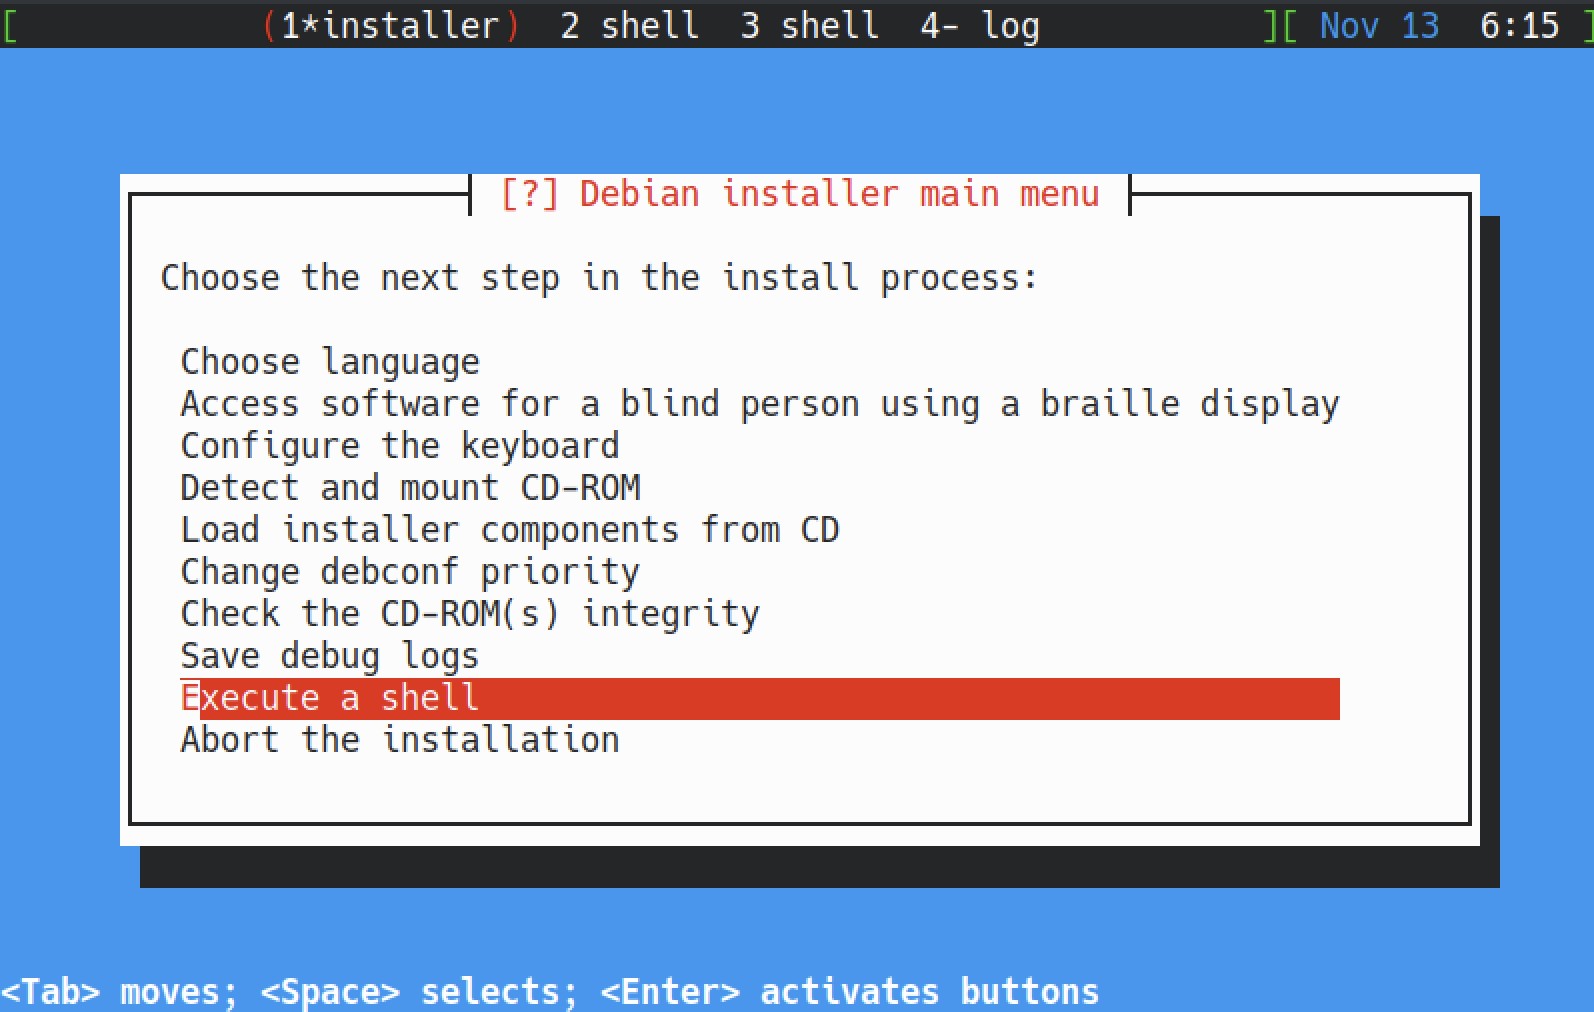
Select Execute a Shell to enter busybox. In fact, I tried to send ALT+F2 in qemu-system console (CTRL+A C) but it didn’t work so I don’t have a better choice.
dmesg would show disks mounted.
1 | [ 9.713510] virtio_blk virtio0: [vda] 9117960 512-byte logical blocks (4.67 GB/4.35 GiB) |
Obviously, /dev/vda is our DVD so just mount the installation partition to /cdrom.
1 | modprobe isofs |
Then switch back to the main menu and select Detect and mount CD-ROM. The following process is quite straight-forward.
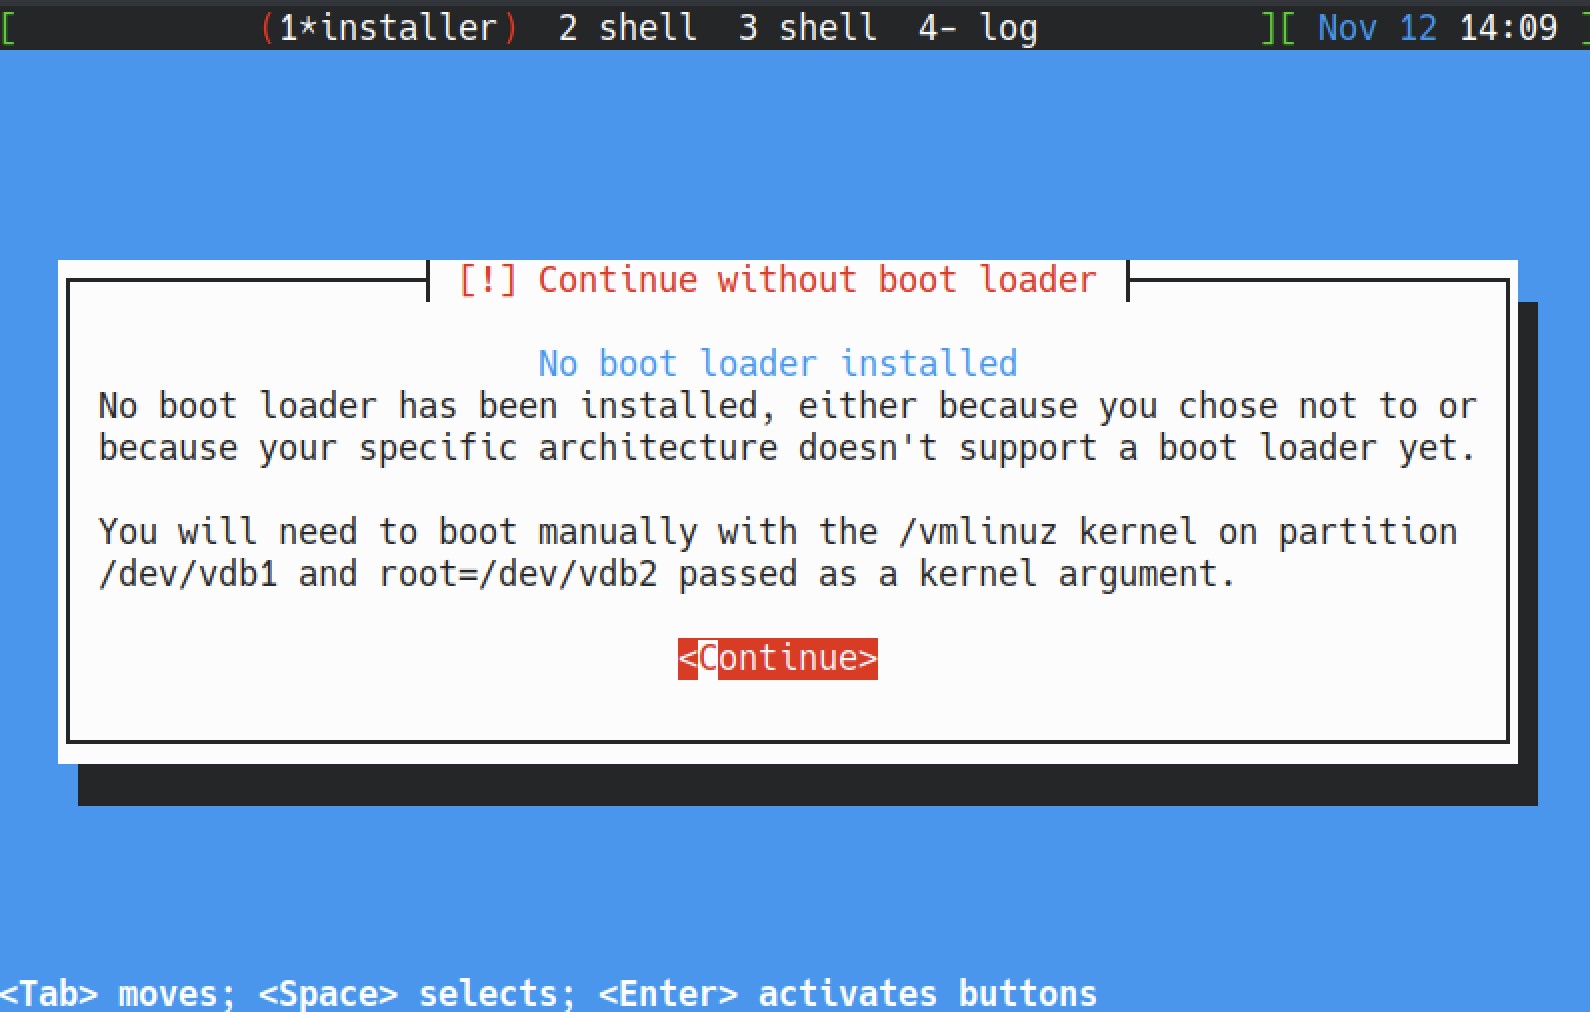
However, for grub installing, it would prompt an error.

It doesn’t matter at all since the grub work would be replaced by qemu-system.
Boot
Extract New initrd and kernel
It’s time to boot our Debian now. The previous initrd and kernel can’t be used to boot the Debian so we have to extract new ones from the disk image.
Here we use virt-ls and virt-copy-out. Note that root is required.
1 | sudo virt-ls -l debian.qcow2 /boot |
Note the symbolic links of vmlinuz and initrd.
1 | drwxr-xr-x 3 0 0 1024 Nov 12 11:55 . |
Copy vmlinuz and initrd out.
1 | sudo virt-copy-out -a debian.qcow2 /boot/initrd.img-4.19.0-12-armmp-lpae ./ |
Boot
Finally, let’s boot our ARM Debian.
1 | sudo qemu-system-arm -machine virt -cpu cortex-a15 -smp cpus=4,maxcpus=4 -nographic --append "root=/dev/vda2" \ |

Well done!
Summary
Compared to qemu-usermode which even doesn’t support multithread debugging, running ARM Debian on qemu-system has lots of benefits, like custom device, even debugging within the Debian. Besides, following the instructions in this post, it is expected to finish installation in half an hour, which is a big improvement compared to network install.
Some hints:
- For those programs which are linked against musl or uclibc, Openwrt 19 uses musl while Openwrt 15 uses uclibc.
- ARM64 Debian can’t execute some ARM32 binary.
- Running Debian on some real device is also a good choice. For example, ARM raspberry PI, some MIPS routers, etc.